


 Many of our readers ask for some specific software which he/she could add a complete "Flash MP3 Player" with one click. So in this article we will provide you that software named Free Audio to Flash Converter.
 You can choose between different colors and functions. Add buttons to your Flash MP3 player like Play, Stop, Next, Previous, Seek bar. Automatically generate the code to copy and paste wherever you want your Flash MP3 audio player to appear on any web page.
How to use Free Audio to Flash Converter
Step 1. Click this Link to Download Free Audio to Flash Converter
This is a clearly free program. There is no spyware or adware. It's absolutely safe to install and to run!
Step 2. Launch Free Audio to Flash Converter
Follow Start > All Programs > DVDVideoSoft > Programs > Free Audio to Flash Converter or just click the DVDVideoSoft Free Studio icon on the desktop.
The interface is very simple and self explaining. There is a field for input files, a field for an output path, and a list with preconfigured presets. If you want to change the theme (program skin), go to Options → Theme.
Step 3. Select Input Audio Files

Click the Add files... button to select input audio file(s) from your computer.
Input file formats: *.aac, *.ac3, *.aiff, *.amr, *.ape, *.au, *.flac, *.m4a, *.m4b, *.mka, *.mp3, *.mpc, *.ogg, *.ra, *.ram, *.spx, *.tta, *.wav, *.wma.
By default the output file name is the same as audio title is. If you want to change it click the Output Name... button. A new window will be opened.
There are some parameters in it (Name Prefix, Postfix and others) which you can set as you like.In the bottom of this window you can see the pattern of the output file name. It's formed according to the current options.
Note: the pattern is the same for all output files during one session, it's not allowed to set the unique pattern for each file.
Step 4. Select Player
Click the Player... button to open a new window.
Select a player style.
Click OK to switch back to the main program window.
Note: click the button "?" to learn more about player functions.
Step 5. Select Output Location
Click "..." button and choose the location where you would like to save your converted audio files. Click Ok.
Step 6. Select Output Quality Preset

Select one of the available pre-configured presets.
Note: Input audio files will be converted to MP3 based on the selected quality preset. The output MP3 files retain the name of the source audio files. If your original file is mp3, after conversion is completed, you can just replace the output MP3 files with the input ones. This preserves the original audio quality.
For advanced users: read this guide to find information about how to customize a preset or create a new one.
Step 7. Convert Audio to Flash (MP3 to SWF)
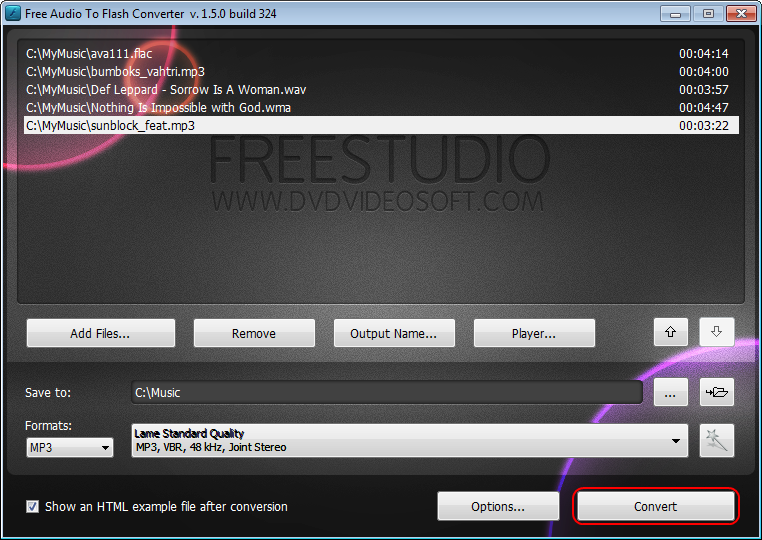
Click the Convert button along the bottom of the interface and wait for the audio to be converted.
Note: Before clicking the Convert button you can set to turn off computer after the process is completed. Just go to Options... and make sure the appropriate box is checked.
Step 8. Playback Converted File
Open the folder with output files and run htm file & Add Audio to Your Website
 Posted in:


